 |
| Now this looks really bad... |

Showing posts with label tutorial. Show all posts
Showing posts with label tutorial. Show all posts
Monday, 18 September 2017
How to fit a D-buckle, or how I fixed that old belt
I had this belt, you can call it boyfriend style. The trouble was that it had been worn out. The faux leather pieces were crumbling, ...so I replaced them with new ones I cut from a scrap of leather I had in a matching colour.

Wednesday, 17 May 2017
How to make a soft belt with a buckle
I love buckles without prongs, which make perfect belt sliders. They are easy to sew, easy to fasten, and turn out to be discreet if you have to loosen your belt after a meal. ;)

I made this belt for my retro-inspired dress. It is in a very light yellow colour and I had a plastic buckle in exactly same tone.

I made this belt for my retro-inspired dress. It is in a very light yellow colour and I had a plastic buckle in exactly same tone.
Tuesday, 14 March 2017
How to mend broken vintage pattern pieces
Everyone who has at least once attempted to sew a vintage style using old patterns probably found themselves in a situation, where they had to repair a damaged piece. Today I will tell you how I mend my sewing patterns. The main problem with repairing these patterns is that they have to remain fit for ironing.
 |
| This is a fabulous style with open back but the previous owner decided to make an alteration and cut the main dress pattern piece. |
 |
| This is the pattern before mending. |
Tuesday, 14 February 2017
Making a retro style handbag - tutorial
Recently I started selling retro handbag handles, made of plastic. Some of them imitate wood to the point that you may have serious doubts as to what they are actually made of. But let's stick to the plan, this post was to be a help to those who are not sure how to make a DIY purse using the retro handles.

Apart from the handles we will need some fabric. It may be matching or contrast, I am going to use black handles and some black-and-white fabric for my handbag.
Friday, 11 November 2016
How to make a sew-on duffle coat toggle closure - tutorial
Duffle coats are all the rage, back from 1970 (and 1990s, and... well, they ARE practical and men love their casual sporty air). Today I am going to show you how to make a complete sew-on closure for a duffle coat, using toggle buttons and leather. We will also need some leather straps or similar.
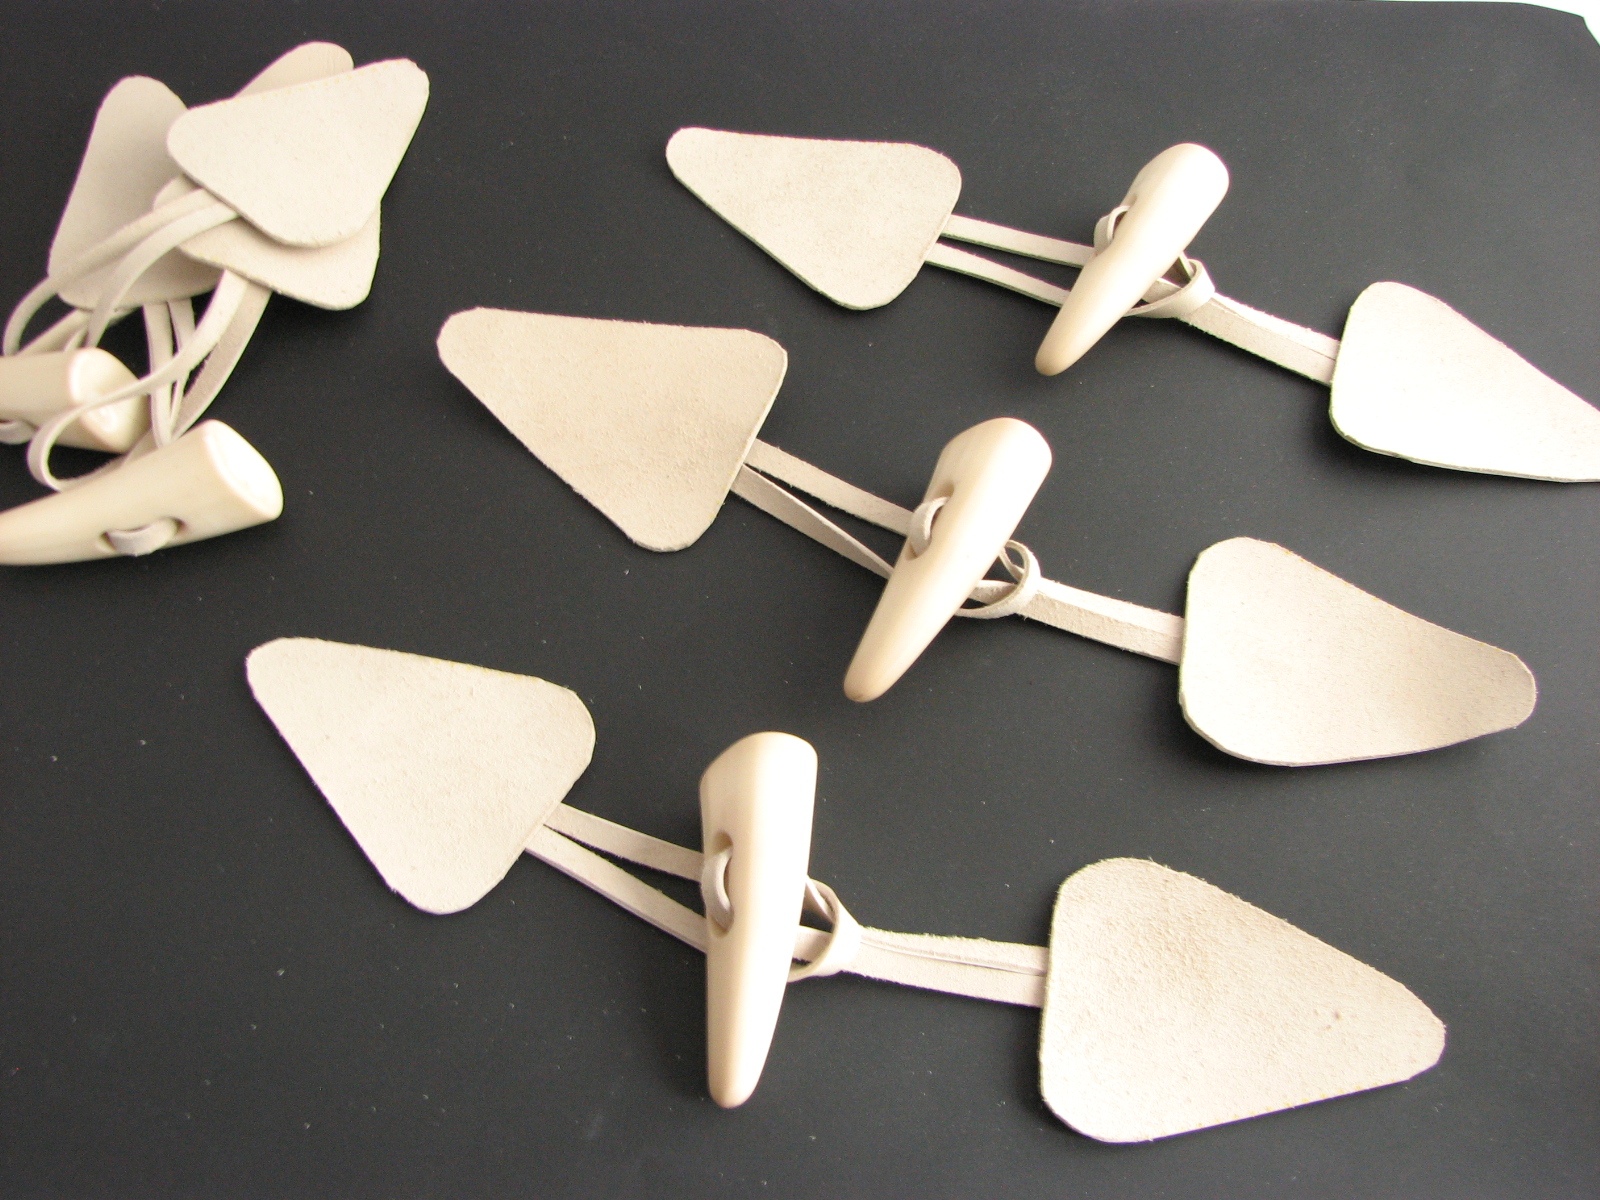

First you need to decide on the shape of the leather pads. They may be square (that's the easiest to cut) or triangular and rounded on the corners. This is my favourite, though I prefer elongated triangles personally, like those you can see in the pictures above. If you are not inspired to design your own shape, you can use the measurement from the picture below to trace them onto your leather.
Wednesday, 7 September 2016
How to attatch a buckle with a prong to a belt
Generally, I prefer slider buckles, not because they are easier to sew, but because they do not require making all these little holes along the belt. Plus you can loosen it slightly while at a big dinner (something so typical in Spain...) in a very discreet way ;)
But today I want to show you how to deal with the other kind of buckles, those with prongs. It works both or metal and plastic prongs, as these can sometimes cannot be removed without braking them.


I know two ways of attaching a buckle to a belt. In the first one you have to consider the prong while making the belt itself.
But today I want to show you how to deal with the other kind of buckles, those with prongs. It works both or metal and plastic prongs, as these can sometimes cannot be removed without braking them.


I know two ways of attaching a buckle to a belt. In the first one you have to consider the prong while making the belt itself.
Tuesday, 19 July 2016
How to take good product photos
...and without photoshop!
Hi everybody!

Hi everybody!

Since I started my button adventure, my photographic skills have improved significantly. At first I had little idea of how to take attractive pictures and they would look like this:
Wednesday, 22 June 2016
How to take a prong off a buckle
Most belt buckles come with a metal prong. While some antique buckles may have casein prongs, which are impossible to remove without breaking the piece, the prongs on most modern buckles are easy to remove. In my shops I do it as a standard service, but if you have bought one WITH a prong and now you have changed your mind, don't worry. It is easy to fix.
You can do it in two different ways. Sometimes one way is better than the other.


 |
| These yellow buckles originally had a metal prong but the customer requested to have them removed. |
You can do it in two different ways. Sometimes one way is better than the other.


Monday, 2 May 2016
How to machine sew a button
Although it may not seem this way, machine-sewing buttons to your garment is not only easier, faster, but also stronger. One day I had virtually five minutes to go, and just discovered that a button was missing from a coat. I found the spare one attached to the label on the lining, but I had no time to look for the needle and sew it. I decided to use the machine. It took me less than a minute (OK, I admit that I had the right thread on the machine).

I will show you how to sew a button using your sewing machine it in a few steps.
Subscribe to:
Posts (Atom)