Wednesday, 7 December 2016

Vegetable ivory - Vegan and eco friendly buttons from early 20th century

Although named after ivory, a controversial material from today's perspective, it has nothing to do with African wildlife. Tagua nuts come from corozo palm tree in south America. They are 100% vegetable and sustainable material, only resembling the authentic ivory in colour, hardness and the grain, which is a bit more tree-like. However, since modern plastic was introduced, they have become less and less popular.

Vegetable ivory buttons can be carved and dyed into small pieces of art!

Friday, 11 November 2016

How to make a sew-on duffle coat toggle closure - tutorial

Duffle coats are all the rage, back from 1970 (and 1990s, and... well, they ARE practical and men love their casual sporty air). Today I am going to show you how to make a complete sew-on closure for a duffle coat, using toggle buttons and leather. We will also need some leather straps or similar.


First you need to decide on the shape of the leather pads. They may be square (that's the easiest to cut) or triangular and rounded on the corners. This is my favourite, though I prefer elongated triangles personally, like those you can see in the pictures above. If you are not inspired to design your own shape, you can use the measurement from the picture below to trace them onto your leather.

Thursday, 3 November 2016

Boot buttons

Nowadays, most footwear is designed to fasten with Velcros, zippers and snaps, some have shoelaces, and some even have parts made of elastic to minimise the fuss with fastening and unfastening. But in the olden days, especially women's boots had a row tiny buttons on metal loop shanks. They were popular until 1940s, when other closure systems became more widespread.


The boot buttons above are quite a luxury compared to most of the kind, made of glass and painted in beautiful colours, like mint green or pale pink. Most boot buttons, however, were made of enamelled metal, and the colours were far less exciting.

Tuesday, 11 October 2016

Button stamps

Dear all,

Until recently, I used to buy the button stamps for envelope decor on Etsy, from other sellers - something very practical and time saving. But then I asked my stamp provider if she could carve one specially for me. She said she was very busy and could not carve any custom stamps...

bubblemailers with button stamps

But I am actually grateful for that because that's when I decided to try my hand at stamp carving.

Friday, 7 October 2016

Celluloid - the indispensabe spy's equipment

Celluloid buttons were the very first I could identify among my buttons. I could clearly see they were unlike the other buttons. And I was not wrong. But first I have to explain myself why I used this unlikely title for this post. Celluloid sheets formed part of basic spy tools: as it is a highly inflammable material, these sheets helped them destroy classified information before it reached the hands of the enemy. During cold war it must have been something very common (I mean both destroying and acquiring classified information). Nowadays spying is more about hacking, so more silicon than celluloid is used in the industry. So let's get back to the buttons.

A range of celluloid buttons from my original collection.
Some have already sold out. 

Thursday, 29 September 2016

How to open a successful shop on Etsy

I am aware this is not the first nor the last post on the Internet to explain how to do business on Etsy. Actually, I don't think one post would be enough to answer this question properly. Nevertheless, I will try to explain some basics, in order to help anyone wishing to start a successful business on their own or simply looking for advice on how to improve. This is especially valuable to anyone who thinks they have good skill or interesting items to sell, but can't find a buyer locally. Etsy is a worldwide exhibition window and only you can put limits to it.

Some years on and more than a thousand sales after I ventured on this project, I have 2 shops and lots of stock to post. I have hundreds of satisfied customers and all-stars reviews, which I am really proud of.

This is the current look of my original shop on etsy.


As you may have read in my initial post about how I found the buttons, I started from scratch and was ready to spend €5 on my business. Later I learnt that if you get invited to open a shop, you can start for free. Well, €5 was not such a big sum and I must say I recovered it quite quickly, but if you do not want to risk even that little, click HERE (if the link does not work properly, email me).

Know your competition


First of all, before you decide to bother yourself and waste time on opening an on-line business, it is advisable to a market research into similar items on etsy. Are there many people selling the same thing? Does this thing actually sell? Does it have any special added value? What kind of customers may be interested in it?

If something doesn't exist on Etsy, chances are, you have misspelled it. Otherwise, which would be very unlikely, you would have to assume that nobody sells anything like it, which could mean that IT DOESN'T SELL: But, as I said, this would be really strange. (You wouldn't believe what sort of stuff people sell on line...)

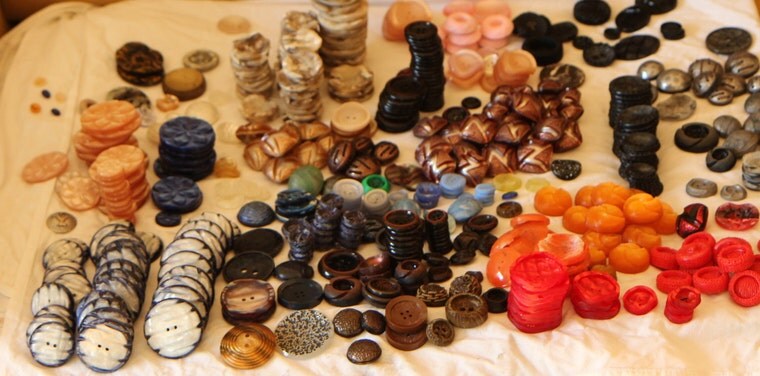
If there are too many websites selling similar items, think of the added value, or uniqueness of your products. There are lots of shops selling handmade jewellery, but not too many sell jewellery made of natural materials like seeds. There are lots of buttons out there, but not too many which are larger than 40 mm, and the bigger, the more sought after!

Also, you can see how the prices range among the competition. You shouldn't, of course, make your product way cheaper, because people may suspect it is worse quality.  But if you are the most expensive, people will prefer to buy from someone else.

It is a good idea to find a role model among shops selling similar items, one that you would like to become, say, in two years' time. It is really motivating and makes it easier to establish short-term and long-term goals.

Stock up your shop

Once you have opened the shop, you must fill it with stock! Use all the free listings, or at least 30 to begin with. If you think you do not have enough range to post 30, think of something easy to make or post and make lots of colours, or post the same item twice if you have two, using different photos and descriptions. Also, this will give you insight to what is more attractive, which description works better etc.

Remember that shops with just a few items will not get many visits. Or no visits at all.

Make photography your priority


While Etsy keeps repeating this all the time, giving you lots of tips, you may want to get some basics. If you are a professional photographer, you know what to do without advice. But if you are an amatuer, just like me, you will see that it takes time to learn the skill. However, in one of my previous posts I wrote a short guide for anyone who wants to take good product pictures for selling purposes.

If you follow this advice, I am sure you will be able to attract customers with your photographs.

Product titles are key


This is the most important part of SEO on Etsy. You must make it clear what your product is here, and also match the search terms you potential customers may use. To do this, you could do a research by looking for similar items on Etsy. This way you will see what search terms you yourself are using - write these down - plus, you can get an idea from the top results of how to write a successful title.

Use 3-4 word phrases, including the main keyword in each. For example:
Black leather handbag, natural leather purse, large shoulder bag

Ideally, these should be joined into longer phrases, which will make them sound more naturally, like:
Black leather handbag with long shoulder strap

Make sure you use the most important keywords at the beginning. To find out what is most sought, you can use google keyword tool. Remember to use all the synonyms here, as well as in the product description.

Also, words like "beautiful", "amazing" and "pretty" will not work. Not only because beauty is in the eye of the beholder, but simply because, nobody uses these terms to search for anything. Have you yourself ever looked for anything by typing 'beautiful'?

Product descriptions


This part should also start with a short description, more sentence-like, of your product. The first words are the most important. I initially made the mistake of writing: 'A lot including 7 large green buttons' at first, missing the hits for buttons. And few people look for 'a lot including'. Now I usually start with something like 'Extra large buttons' or '7 blue buttons', or 'a button card with'

Do not make your description too long. I doubt whether many people would read more than a few lines of it anyway. Make sure you have enlisted the most important features. I use a list, like the one below (this one is from a buckle description):

colour: dark brown
diameter: 90 mm / 3 9/16"
Suitable for 54 mm / 2 1/16" belts

Do not include all the shipping options and shop policies here. These have a specific space on your shop page. Also, if you want, you can pinpoint the most important questions in FAQ, which will be displayed right below the description, also on mobile devices.

You can also add information about the manufacturing process, care, or even the item's history if it is a vintage object. These are usually interesting to read. But do not ramble on length.

Mind, that on mobile devices, and that includes tablets too, the item description is not displayed at first sight. And few people click on "more info" (they even prefer to send a convo with a question about something they could easily read there). So, if you have some important characretistics, for example in my case, the button size, add this in 'Variations', even if there is only one size available. This will add an extra line in the details column, visible also on mobile devices. I started doing that when more and more people suddenly started asking me a lot of questions about the dimensions, although the information was already provided in product descriptions. I soon changed all listings to include this extra line of information, and guess what? I don't get these questions anymore.

Tags or Search Terms


These are for sheer SEO purposes, so make sure you do not add too many descriptive words which are not used but potential buyers. But... how to know what is used in search?

  • One way to do it is to go to Stats and check all the most popular search ter
  • ms over a time, and use these or similar. But you can only do that after your shop has been running for, say, a month in the very least.
  • Another way is to use the google keyword tool to get some real numbers. 
  • Again, you may imaginne you are looking for this item and see what you use. 
  • Go to the 'Search for items or shops' field and introduce one word, for eample 'buttons' and one space. Etsy will automatically give you some hints on what you may be looking for. These are popular search terms. 
  • Don't be afraid to experiment. A good idea is to use one completely unique tag out of 13 which will be unlike anything else. For example, I used klingon style for one of the buttons. Now guess what? Somebody actually used it and clicked on the buttons. You may discover a whole world of strange search terms that people use!
If you choose the right category for your product, this will add some valuable tags to your list. Look at the first four keywords, with capital letters. These were added automatically, and they are really strong.


Avoid tags like 'round buttons'. Obviously, some buttons are round, but if you someone is looking for buttons, they will just write 'buttons', unless they specifically want triangular or square ones. I did that at the beginning too, as I didn't know how to use up all the 13 tags.

One of the most important things I have learnt about the tags is that you should use two or three words instead of just one for every one of them. At the beginning I did not know that and used tags like:

'button', 'black', 'large', 'flower' etc. 

Believe me, hardly anyone visited my shop. And then I dug the Etsy blogs and in an old discussion post some suggested this to someone else. I decided to try it and BOOM! My stats sky-rocketed! Now I usually use:
'black buttons', 'large buttons', 'flower buttons', etc. 

It doesn't matter if you repeat the key word several times. Google may not like it, but it will help you gain visibility on Etsy. It is important that you understand that Etsy and Google SEO do not work the same way. It is really great to be found on Google, but even more important to get found on Etsy.

Your appearance shows you are a professional


We may not judge a book by its cover but we certainly measure the professionalism by the image a shop gives. This is why you should upload a shop logo, a background picture and a banner (I use this one for packaging slip). Ideally all of them in coordinating colous and themes. Your picture is also a sign that you are a professional - but also a human. No scam. You can use other professionals to help you out. There are thousands of designers on Etsy, specialised in Shop logos and banners. You can also have a go and try to make it yourself.
Don't worry about the background picture - you can improve it later. To start with, you can use a picture of your range, for example, clothes on pegs, I used to have a picture of several button cards, simply cropped into the measurements that Etsy required.

I was lucky, because my sister, who sometimes does graphic design, and also calligraphy, designed a logo for me. With it, I created a nice background composition, using my items.

This is the background photo of my newer shop. I used the same logo for branding purposes.

I use free software for that, like IrfanView and Inkscape. At some point I even used MS PowerPoint to put together some compositions.

Make sure you select a few nice items as featured listings, which will appear at the top of your shop. This will draw people's attention to them and plus, it will add 4 more items to your first page, which is especially important if you do not have too many items.

Add new items regularly


It is definitely a bad idea to add all your items the very first day and then just sit down and wait what happens. The Internet loves fresh content and it is insatiable. So it is best to keep feeding it regularly, but little by little. Later on you will have to renew the listings (they only live on Etsy for 4 months). This will give them new life, and it is also a good moment to revise them and change a part of the title or tags to something that works better.

New and renewed items also pop up on your fans' main sites. So do the Updates, which are pictures you can upload from the mobile Sell on Etsy App. These are also a good idea to bring your buttons to potential buyers, but you will have to install an app on your mobile or tablet. While it is convenient to have it on a device with a camera, it is best to upload quality pictures, taken with a normal camera, as they will be displayed also on computer screens.

Etsy shop updates are best when they include a picture of an item during the production process or a finished product in use, rather than just a repeated detail picture, although sometimes it is not a bad idea to post a close-up photo which is not the main product picture.  

* * * * *

Don't forget about social media, the word of mouth and some good old business cards to promote your shop. Well, how to promote the hop after it has been opened could fill one or more new posts...


I hope you have enjoyed reading this post and even more, you found it helpful. Making mistakes is normal. Learning from them is intelligent. And if you can, avoid them by reading posts like this one.


Good luck!

Wednesday, 14 September 2016

Déboutonner la mode - My most treasured Book

This book is the catalogue from an exhibition I went to see while visiting Paris last year. It was a surprise visit. Our host offered to take us to Louvre, though not to see the main exhibition, but a small one, dedicated to fashion jewellery and buttons and their history. While the jewellery section, which turned out to be really small, did offer some interesting pieces, it was the button exhibition that was truly impressive!

De-boutoner la mode

The book was also a surprise, as I got it as a gift.

Wednesday, 7 September 2016

How to attatch a buckle with a prong to a belt

Generally, I prefer slider buckles, not because they are easier to sew, but because they do not require making all these little holes along the belt. Plus you can loosen it slightly while at a big dinner (something so typical in Spain...) in a very discreet way ;)

But today I want to show you how to deal with the other kind of buckles, those with prongs. It works both or metal and plastic prongs, as these can sometimes cannot be removed without braking them.


I know two ways of attaching a buckle to a belt. In the first one you have to consider the prong while making the belt itself.

Monday, 29 August 2016

Casein - An Early Plastic

As I was cleaning my first group of buttons, I started discovering different materials. At the beginning I expected all the buttons to be simply made of plastic. I had no idea they could be any different. Of course, I could tell some were made of metal or mother of pearl, but the rest was just plastic to me.

These buttons smelled suspicious to me...

But then, some buttons looked different. They were lighter or made a different sound when put together in a bag. Some others had uneven surface on the back. I started researching and I learnt that there are lots of other materials in the plastic family, actually, most are early kinds of plastic, which have different properties. And thanks to this information, it is also easier to date the items as made in different decades of the 20th century.

Tuesday, 19 July 2016

How to take good product photos

...and without photoshop!

Hi everybody!


Since I started my button adventure, my photographic skills have improved significantly. At first I had little idea of how to take attractive pictures and they would look like this:

Wednesday, 22 June 2016

How to take a prong off a buckle

Most belt buckles come with a metal prong. While some antique buckles may have casein prongs, which are impossible to remove without breaking the piece, the prongs on most modern buckles are easy to remove. In my shops I do it as a standard service, but if you have bought one WITH a prong and now you have changed your mind, don't worry. It is easy to fix.

These yellow buckles originally had a metal prong
but the customer requested to have them removed.

You can do it in two different ways. Sometimes one way is better than the other.

Wednesday, 11 May 2016

Button Button - my first book about buttons!

When I started my button adventure, I had little idea of the immense variety of buttons, designs and materials there might be. I could date my original collection very easily, as the buttons were from an old haberdashery shop, opened circa 1958 and closed sometime between 1962 and 1963. So there is little doubt left about it. However, as I got interested in the early plastics and vegetable ivory, I decided to look for more precise information. That's how I encountered "Button Button" book.


It is not a new publication, as it was issued in 1993. As you can see, the pictures look really old, and what was new then, is already vintage today. ;) For example, 1970s buttons are referred to as modern.

Monday, 2 May 2016

How to machine sew a button

Although it may not seem this way, machine-sewing buttons to your garment is not only easier, faster, but also stronger. One day I had virtually five minutes to go, and just discovered that a button was missing from a coat. I found the spare one attached to the label on the lining, but I had no time to look for the needle and sew it. I decided to use the machine. It took me less than a minute (OK, I admit that I had the right thread on the machine).


I will show you how to sew a button using your sewing machine it in a few steps.

Tuesday, 19 April 2016

Lobster craze

Have you heard of the Lobster Dress?


It was originally created in 1937 by Elsa Schiaprelli in collaboration with Salvador Dali, which can only give you an idea of the atmosphere in which it was designed (maybe some mayonnaise?). Initially it was meant to be a sundress, the length just below the knee, and with two lobsters crawling on the silky fabric among parsley leaves.

Wednesday, 9 March 2016

'Old Buttons' by Sylvia Llewelyn - A fantastic little book!

I have bought this book because it was sold on a website dedicated entirely to buttons. The book is actually written by the owner of the website, which is also a shop, where you can buy a selection of vintage buttons. So I assumed it must be a truly interesting one. And well, I wasn't wrong!


The size is so cute, too.

Friday, 12 February 2016

Hello World!

Welcome to my blog!


Me in a me-made dress, with one of the buttons


I have decided to start writing about my button experience. I have been selling sewing supplies for over two years now and I have learnt a lot in the course. I would love to share this knowledge, as well as experience with any button lover, retro sewist, or anyone wishing to pop in and take a look.

It all started when my fiancee brought a handful of weird vintage buttons home. I was fascinated! They were so different from whatever I had seen! And most importantly, they were huge! And... he said there were thousands more. I wanted to see them all, of course, and the next thing I remember was venturing along the dark corridors to the abandoned house which belonged to his grandma. To have the full picture of what kind of building it was, you should know that it is not an old cottage, lost somewhere in the hills, where no road leads. Not in the least. It is an old hotel in one of the main streets of our town, Ourense. Perhaps the hotel part is a bit run-down, but there are two prospering shops on the ground floor. And this is where the buttons originally come from.


This was that original hadnful. I still have some of the buttons, like the one in the lower right corner, which I made into a necklace. The scissors are here to give you an idea of the size of the buttons, though I use something else for that now.

In late 1950s a lady opened a haberdashery in one of the shops. I can't tell you now how the business was doing, but a few years later, in 1962 or 1963, the lady decided to marry and moved to a different town. The shop was closed and whatever stock she could sell was gone. However, there were lots of boxes full of buttons, along with some beautiful buckles, which did not find a buyer and were put upstairs, where her family lived. Years later, the family, which had had a successful bakery business next door to the haberdashery, retired and also moved out, selling their part of the building to the hotel owner. When she discovered the button tresure, she let it be where it was, in a small dark room upstairs, as she was a practical woman and knew she might need one or another button someday. Had she needed that room, the buttons would have been out long ago. But she didn't.


Buckles in their original boxes

When I got my hands on the buttons, they were still in the same boxes, piled up on an old piece of furniture, I guess from the haberdashery. It was so exciting! Of course, we were not able not take all of them at once, which may give you an idea of how many there were.

The buttons outside the boxes required cleaning, but those stored inside them were perfect. Some were still on button cards, a thing I had never seen before. Then, with thousands of buttons in my possession, I stared wondering: what am I going to do with them all?!


Just a small part of my button treasure. Most buttons you see here have sold out.

I am a sewist and I love sewing retro. I used to make a lot of the stuff. But even if I dedicated all my time to sewing, I would hardly find use for all the buttons. Then an idea crossed my mind. Etsy! Until then, it had been my primary source of vintage sewing patterns, some to use and some just to admire. But why not sell part of the button treasure?

I decided to invest just €5 as I didn't want to risk. If I sold anything, it would be great. If not, I can spare the €5. And that's when it took off!

Initially, my idea was to sell just some of my buttons, but I was encouraged when I met other people, even more passionate about buttons. I also met someone who had an even larger treasure of vintage buttons and wanted to sell them, so they asked me for help. Could I possibly have said no?


Now I regularly search the Internet for similar deals. Need to get rid of that box your granny or someone else stored for all those years? Someone closed down a haberdashery long ago and couldn't find a buyer for the buttons? That's when I step in, to save the old unused buttons, which may turn out to be really valuable. You wouldn't believe what treasure thinly avoids ending up in a landfill! And just because someone does not know what to do with it and needs to clear a space...